Beginners Guide to Back to Eden Gardening
Do you want a natural garden that requires minimal effort? If so, the Back to Eden Gardening Method is the process for you. It requires no watering, no weeding.
This year's garden will be different than we've ever used because we're falling in on an already started garden.
While it is gorgeous and looks well-manicured, it's not our usual method of gardening. So, we don't have current pictures to show, but we will update this fall!
Our usual method of gardening is the Back to Eden method. This method produces beautiful organic vegetables that you and your family will love and enjoy.
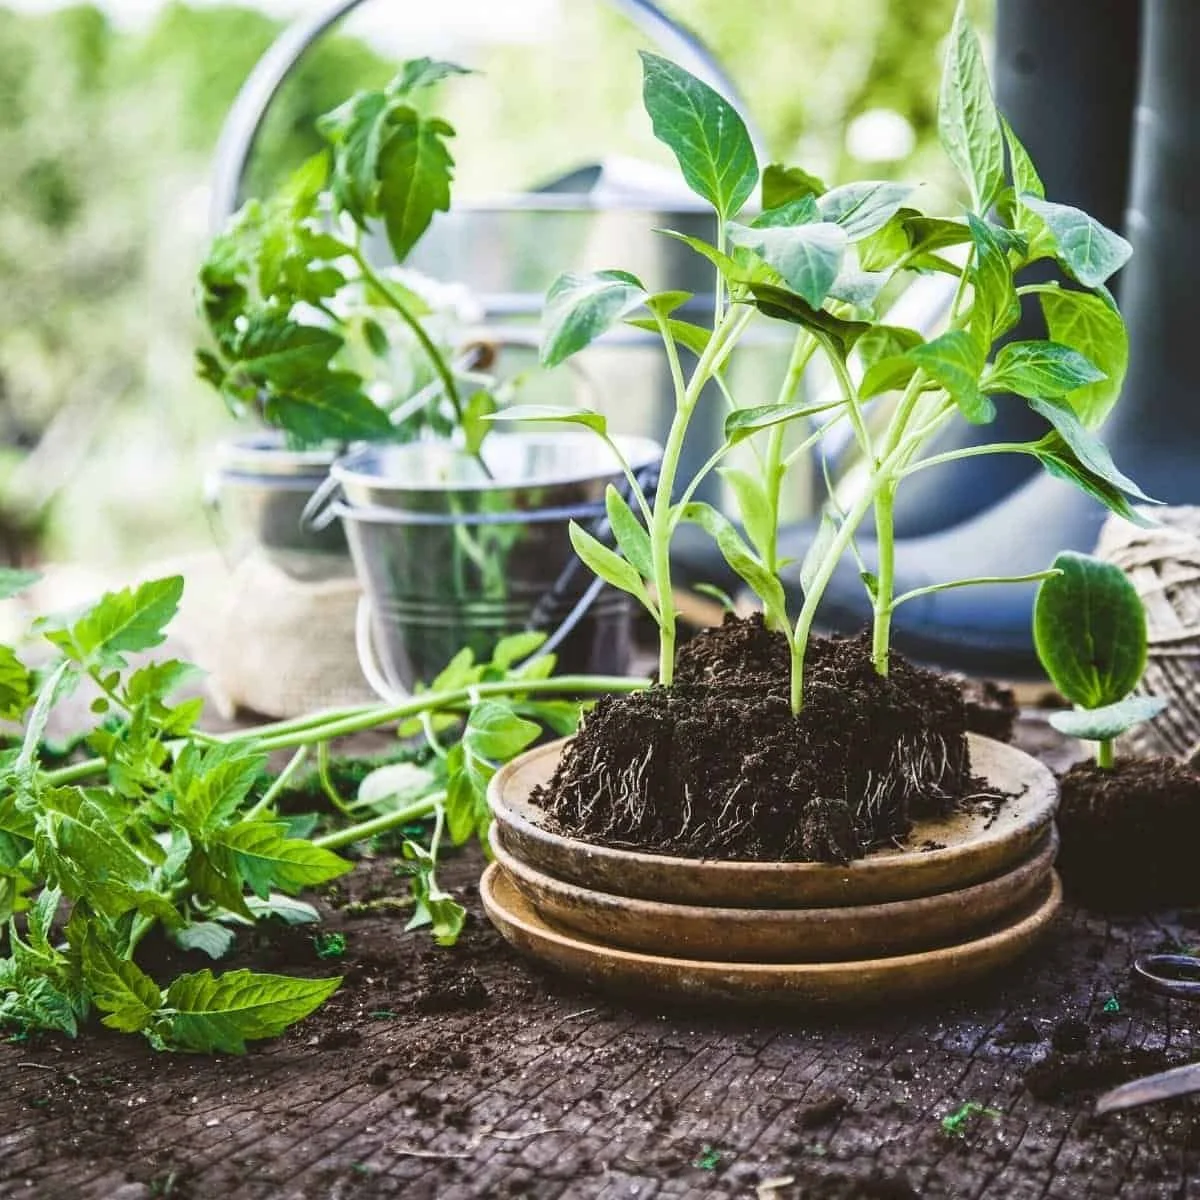
The ground cover provided by compost, chopped leaves, or wood chips adds nutrients back into the soil, retains water, and will prevent grass and weeds from growing.
Pro Tip #1: Use non-GMO seeds and plants; everything in our garden is an heirloom plant, and we have used Seeds Now for our gardens.
Pro Tip #2: Save your seeds for next year. Make that initial investment. Then save seeds. We collect seeds for each plant. By doing this, your garden will provide for you for years to come. Repete this process for each growing season.
And Pro Tip #3: Avoid chemicals, and processed soils, mulch, and wood chips. You don’t want that in the soil.
How to Get Started with Back to Eden Gardening
Aside from the fall time prep, this is the easiest and most laid-back gardening method I've ever used and found.
You're using tips and tricks from nature to create an abundant garden free from weeds and problems.
Every person we've talked to that uses this method of gardening has nothing but good things to say about it.
There's no tilling, no weeding, nothing. You just let it go and let it grow.
Step One: Decide where you want your garden.
An old spot you have used for years or a new one. We recommend if you can pick a new place. Your old spot may not have the necessary nutrients unless you have been adding compost and natural garden boosters to the soil
Natural boosters: Chicken, rabbit, horse, cow manure, chopped leaves, grass clippings. We try to add all of this throughout the year so that our spot is super-rich and fertile.
Step Two: Newspaper
You'll want to contact your local newspaper company and see if they will allow you to pick up old newspapers. This typically isn't a problem as they usually have plenty of leftovers.
Then, you'll want to cover the entire garden area with newspapers laid out. You'll want to have 3-4 sheets of paper covering your ground.
This will smother out the weeds and prevent them from growing any further in the garden area.

Step Three: Compost
With 2-4 inches of compost, cover the ground. You can use your homestead compost or contact a local ranch/Farm for chicken, horse, cow, or rabbit manure. Some places will deliver it by the ton. It will smell for a few days, depending on how fresh it is.
Note: On our homestead, no one lives for free. Each animal provides to the farm in one way or another: sheep, horses, rabbits, goats. The sheep offer compost, meat, and grass cutting services. The horses provide fertilizer and physical labor. Chickens offer meat, eggs, and compost. And the rabbits provide meat, hides, and manure. Use each animal to its fullest extent.
Step Four: Leaves & wood chips to cover the compost.
About 2-6 inches worth of chippings over the compost. We have found that 5 inches work the best.
When using wood chips, make sure it is untreated. You want pure wood. If you have a wood chipper, this will work, or your city/county dump may have some for free or cheap. Many places will deliver it by the ton. You may have luck contacting your local farm or landscaping store.
Step Five: Planting time.
Pull back the first layer of chopped leaves or wood chips and place your transplanted plant in the compost about 1-2 inches deep.
It is best to let the compost mixture rest for one growing season. This is to prevent the plant from getting burned by the nutrients. Manure is rich, chicken manure is extremely rich and can cause your plants to die. By waiting a month or two, the ground will absorb the bulk of the nutrients, and your plants will be safe to plant.
If you didn’t use fresh manure, you could plant the day your garden is ready.
If you are new to planting gardens or if you are a perfectionist. It is ok if the measurements are not exact or everything is not perfect. The plants will not care if your bed is not square or one row is longer, or if they are in 5 inches and not 3 inches of compost.
Step Six: Plant before a rain if able.
This will help ensure that you will not have to water. If you can't plant before the rain or if the rain never came, then you could add water to the freshly planted plants.
Related Post: How to Grow Squash: Tips and Tricks for Beginners

Common Questions You Might Have
People will sometimes give us the stink eye when we mention Back to Eden Gardening, and we understand. Not everyone has heard of this method or even believes it's something that can work.
So, we want to address some top questions.
Does Back to Eden gardening really work?
Yes, Back to Eden gardening works. And for those folks who use it and it does work, it works amazingly well. Other people report that it's been far less effective for them. In most of those cases, it's because they don't understand the principles of composting.
How do you grow a vegetable garden back in Eden?
The process above is how we've started gardening with the Back to Eden Gardening method.
Should you turn over garden soil?
It isn't necessary to turn over the soil to loosen it. The covered ground might not seem as soft as a layer of freshly tilled soil at the top, but it's much softer throughout the underneath layers than tilled soil will ever be.
Can I use fresh wood chips in my garden?
No, we do not ever advise putting fresh wood chips or shavings into the garden. They will draw out nitrogen from the soil rather than add to it. Your garden needs that nitrogen.